December 22, 2012

Peace on Earth 3D Nativity Card

I bought the cut file for this 3D card from the Silhouette store.  It was made by Samantha Walker.

All I had to do was put the paper in the machine, peel off all the tiny stars from the Silhouette sheet (which took forever), scored the fold lines and put it together.  I added text in silver pen after taking the photos.
The front of the card.
The inside, a 3D pop-up nativity!

December 21, 2012

Deck the Halls Card

This card was one of the make & takes at the Creativ Festival last year.  It was my first time using pop-dots (if you can believe that).  I don't know the paper companies we used, though I do remember that the Deck the Halls tag came decorated (with the exception of the twine).  The corner pieces were from the same die cut the tag was from.

This was the card that convinced me that card making could be so much more than stamps on paper (not that there's anything wrong with stamps on paper).  After this I got into embellishments more and started experimenting a lot with my cards. :)


December 20, 2012

Angels We Have Heard On High Card

Since I went to all the work of making my Angels We Have Heard on High sheet music, I wanted to make more than one card with it.  
For this one, I used red and gold ribbon for the borders and a stamped and coloured angel (from my mystery set) as the central image.  I coloured her dress and hair with pencil crayons and used a silvery blue gel pen for the sash and a gold gel pen for the halo.

I added a thin edge of cream paper to pop-dot my sheet music on, so it would look like a stack of carols instead of just one.  


December 19, 2012

Recycled Christmas Cracker Card 2

For this card, I again used the Christmas cracker trim for the top and bottom border of my card, and the main image as a centerpiece.  I dry embossed Noel (from my mystery stamp set) in silver beside it.  :)


December 18, 2012

Recycled Christmas Cracker Card 1

My sister-in-law had Christmas crackers at our places for dinner last Christmas.  While I enjoyed pulling it apart and getting my prize, I thought it would be a waste to simply throw them out as they were so pretty.  So... I took most of them home with me.  And made cards out of them.  

Here's the first one:
I used the outside part of the cracker for the edging at the top and bottom of my card.  Then I used the main image from another cracker (there were 3 shades so I mixed and matched them) for the centerpiece.

The mini "Angels We Have Heard on High" sheet music was something I downloaded off of a public domain site.  I got the angel from this public domain image site, and the trim from another page on the same site (I did this in January and so can't find the image now).  I used pixelmator to add them together and printed them off really small on a cream coloured resume paper I have.

December 14, 2012

Easy Christmas Gift Tags

Since I knew I'd be working a lot in December (and it turns out I'm working more than I expected) I did a lot of my Christmas shopping early.  Which also meant wrapping the presents early.  (Note, I made these at the end of November.)  I needed some quick gift tags that I could put on my packages and so dug out some stamps.  My idea with these was to use small or part images, so there's more of a hint of Christmas rather than something fancy (besides, let's face it, I'm not going to save my tags for next year so why go overboard on them).

These 6 tags took about half an hour  (or maybe even less) to do, from cutting the paper, to stamping, colouring and adding the glitter glue.  I kept the colour scheme simple - red, green and yellow - for all of them.

I'm usually a stickler for getting the entire image on my cards, so it was a little difficult for me to only stamp part of the tree and angel, but I think they worked out well.
Supplies:
Cardstock: Recollections
Stamps: the snowflake/star & stocking are Recollections; the holly, candle, tree and angel are from a Christmas cling set I bought at Michaels last year but I threw out the packaging and don't know what brand it is
Markers: Crayola
Glitter Glue: Recollections

December 13, 2012

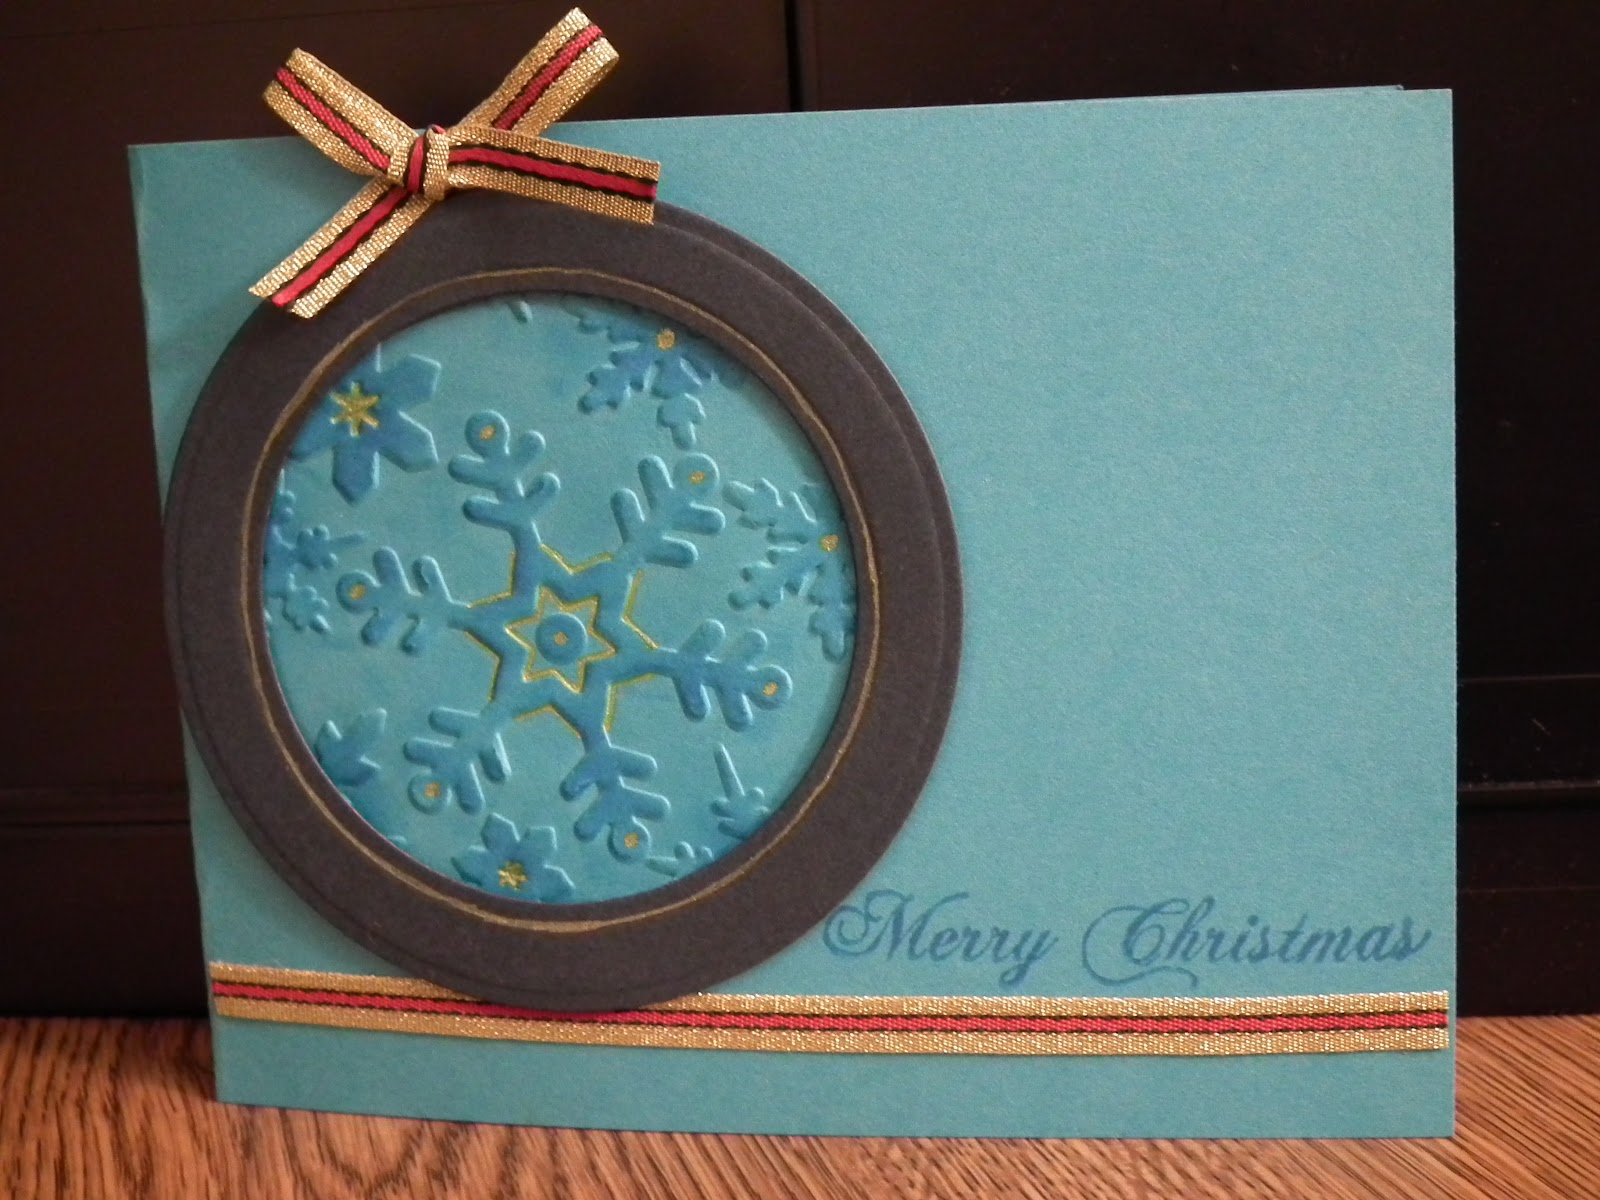
Homemade Embossing Displaced Ornament Card

I picked this blue because I don't really like it and I didn't think the homemade embossing displacer would work well for the circle.  Well, it worked beautifully so I had to figure out what to do with the card.  The idea for an ornament came to mind so I cut out a circle that could fit around the embossed area.  In retrospect I should have chosen a dark blue rather than white.  I also should have use my Memento blue ink to darken the embossing area before adding the white ring (as I got a bit of blue ink on it).  I used a gold gel pen to make swirls on the ring and add some colour to the snowflakes.  I also added an ornament topper in gold ink and ribbon.  The sentiment is from Kaiser Craft's Christmas sentiments set.

When I was writing up my Christmas cards I realized I REALLY didn't like this one.  So much so, that I was too embarrassed to assign it to anyone on my list.  Having received my Spellbinders Classic Circles Small in the mail the previous day I decided to try something to fix this.  It was my first time using Spellbinders.  Since I have a Silhouette I didn't want to spend more money on dies, especially simple ones like circles.  But... I've seen techniques that are easier to do with dies, like placing a hole on a particular point on a card (which is hard to do with precision on a Silhouette), etc. that I wanted to try.  I also like the embossed edge Spellbinders give.  Anyway, I was surprised by how much the dies cut into my acetate cutting pads.  Up until now I've only used my Big Shot for embossing, which keeps the acetate nice and clean.  I now understand why people suggest turning the acetate over when die cutting, so they last longer.
 The acetate is quite reflective, so you can't see the circles too well, but there are 4 of differing sizes cut into the pad.

I also got to finally use the crease pad I bought about a year ago, thinking it was the rubber pad, and the rubber pad I got yesterday.  Together, they add up to the thickness of a cutting pad and let you emboss the Spellbinders dies.  (The die came with a different sandwich that called for a tan rubber mat, but my sandwich worked fine and doesn't require me to buy another mat to use.)

I decided to cover the white circle, which just looked odd, with a dark blue one.  The embossing on the circle helped make it look more professional.  I also went over the gold again, with a pen that looked less yellow.  I should have used silver for the accents instead of gold.  Ah, well.  Live and craft some more.

Here's the new finished card.