September 14, 2012

Steampunk Heart

Got another quick card post today.  I wanted to do something steampunk and I got this great stamp set called Musicale, with a steampunk heart.  I stamed it on black paper because I wanted to test out my metallic bronze ink.  


Alas, the ink (being pigment) didn't seem to dry entirely, or flaked off when I used pop dots on it so that raised section isn't glued on properly.  I'll either need to find another way to attach it, or just glue it flat.

Aside from that, I like this card, especially the gears in the heart and the steampunk embossed background.

Supplies:
Cardstock: Recollections
Stamp: Prima Marketing - Musicale, Kraftin' Kimmie - Steampunk Sentiments
Embossing Plate: Cuttlebug - Clockworks
Hot-fix gems: Imaginesce

September 13, 2012

Elegant Flower

I've got lots to do today, so you're getting another quick card post.  This is a flower stamp I saw someone else use and thought looked fantastic, so I bought it.  And yup, it does look fantastic.  It's accented with some gold pearl hot-fix gems and a new punch that I absolutely love.

Supplies:
Cardstock: Recollections
Stamp: Penny Black - Dreamy (Flower)
Ink: Encore Ultimate Metallic Gold
Punch: EK Success 2-in-1 Lili Pad
Hot-fix gems: Imaginesce

September 12, 2012

Mounting Rubber Stamps

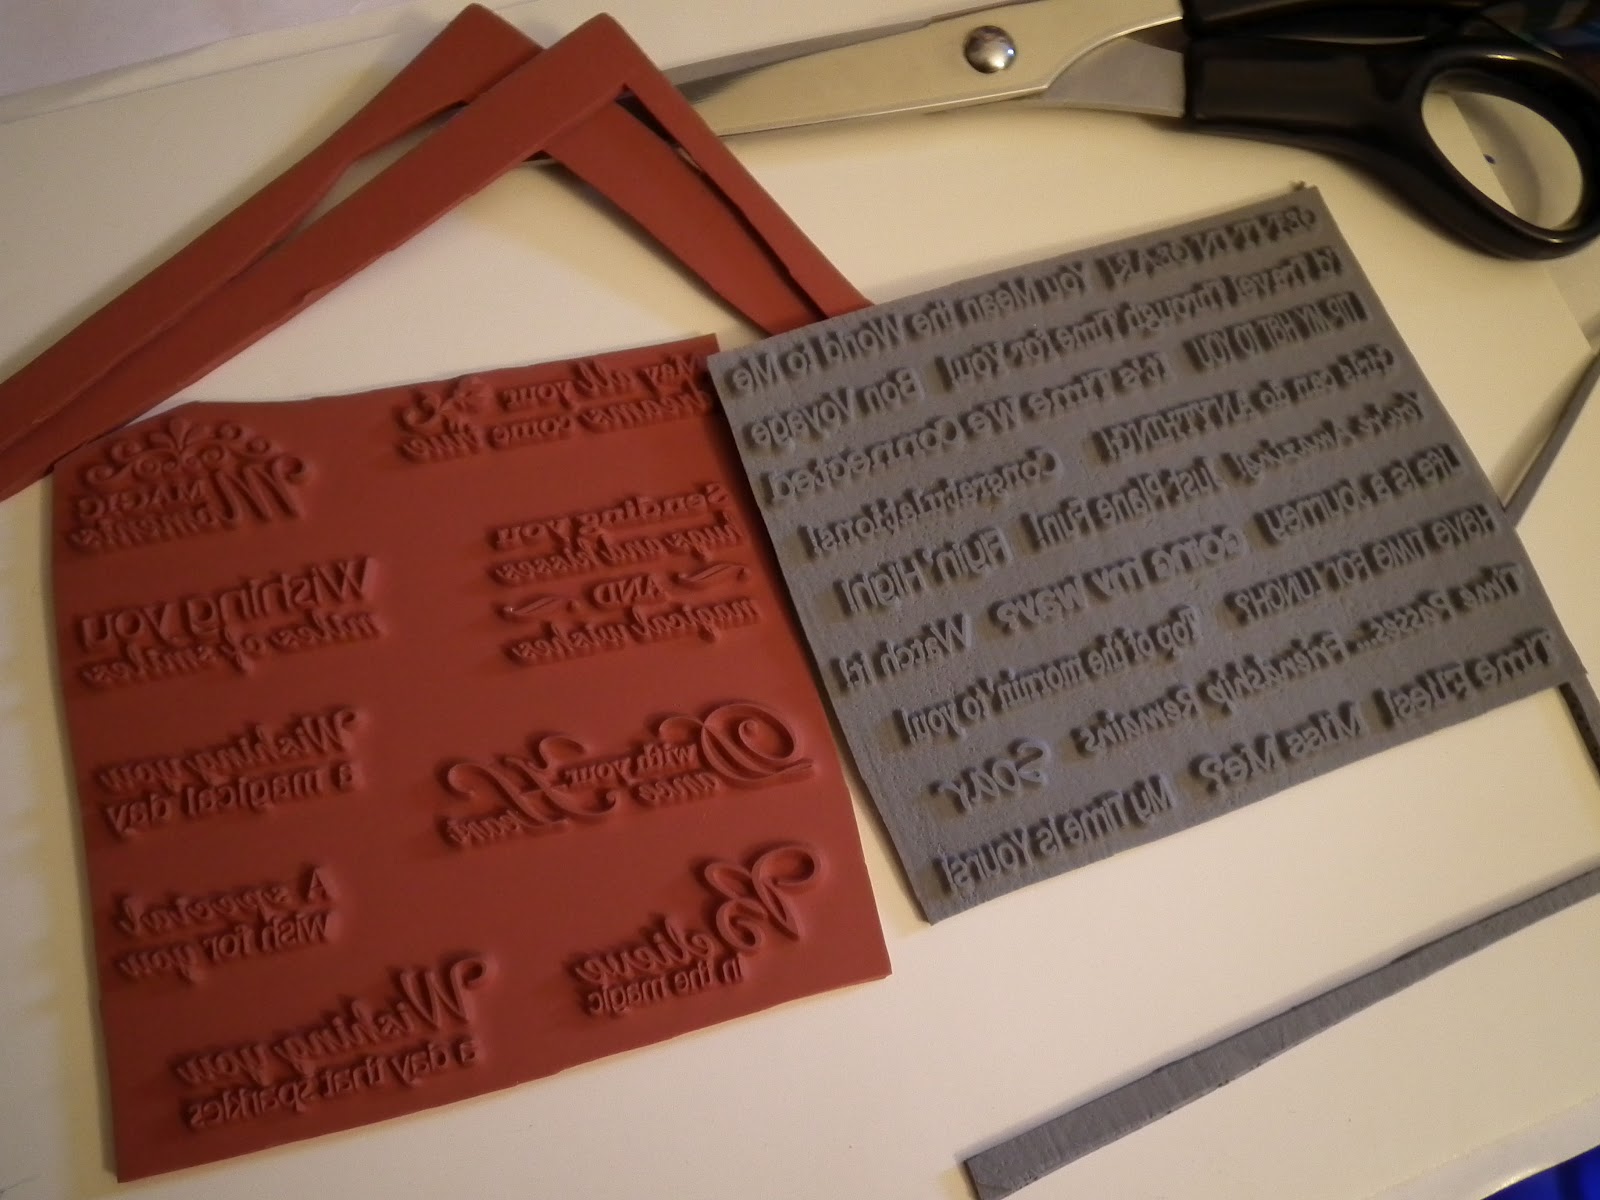
So, my cling foam arrived and I was able to mount my sentiment stamps.  Following the directions of a video I found on youtube a few weeks back, I got to work.

Step 1, trim the outside edges a bit.

Step 2, cut the cling foam to size and peel off the paper on the sticky side.  This stuff is VERY sticky, and will muck up your scissors when you cut it (ie, you'll get sticky residue on your scissors). Use an eraser to get the residue off when you're done.

Step 3, with the rubber on the foam, cut the different sentiments apart.  This is fairly hard to cut, as the foam is quite thick and the rubber tough.

This is a bonus step.  After peeling the front paper off (the side that clings to acrylic blocks), I used a Copic (ie permanent) marker to write the sentiments on the front.  I figured it would be easier to find the sentiment I'm looking for if I can read them faster (and while I can read backward script, why put myself to the trouble?).
Voila, self-mounted sentiment stamps.  I definitely prefer buying my stamps prepped for stamping but doing it myself was an interesting experience.

September 7, 2012

Birthday Butterfly and Flower Card

This card only uses a bit of ink painting, but I managed to do it without any lines.  Just nicely blended ink.

I like the effect you get with Spellbinders dies, but don't own any (yet).  To get the effect - the uninked rim around my circle - I cut shapes with my silhouette out of acetate that are just a bit smaller than the circles/shapes I cut out from cardstock.  When I layer the acetate outline over my cardstock, I can ink inside the circle and still have a crisp white outline.  You don't get the embossing on the outer edge that the Spellbinders die would give you, unfortunately, but it still looks pretty good.  :)


Supplies:
Cardstock: Recollections
Stamps: Close to my Heart - Delight, Kaiser Craft - Birthday Sentiments
Ink: Memento
Punch: EK Success Lily Pad 2-in-1 edger punch
Hot-set rhinestones

September 6, 2012

Ink Sponges

Part of my quest to learn how to ink paint was figuring out if the sponges I was using (some face make-up sponges I had lying around and sponges that came as filler with a set of hot-fix rhinestones) were appropriate for this type of project.

The black filler sponges came square and I tried rounding them so they wouldn't leave streak marks.  After trying - unsuccessfully - to reproduce the ink painting I've seen on other sites I decided to buy actual ink daubers (craft sponges designed for this purpose).  I wanted to see if the daubers were special in some way.  The sponge on the daubers is a cross between the two sponges I was already using.  It's got small pores and is quite soft to the touch as well as having a rounded top.

With regards to ink painting however, I had the same problems - streaking and hard edges.  Obviously my problem was not the sponges then (or not just the sponges).  So I tried something else.  I tried not putting as much ink on the sponges.  Voila!  Apparently I was over inking the sponges, making their first contact with paper too ink heavy, so they smeared and left firm lines.

In addition to the over inking, I suspect you're also supposed to leave that first smear on whatever mask you're using with your project (for land/sun/landscape background), then smear a smaller amount from there onto your project.  I'll have to practice with these ideas, but my first attempt with this knowledge turned out quite good.  I'll post that card tomorrow. :)


September 5, 2012

Fairy Card 2

Following soon after making yesterday's card, I tried the same design again.  This time, instead of doing the background first, I stamped and coloured the image.  I then made a mask of it and covered my image, allowing me to stamp leaves and sponge ink over the background without interfering with my fairy.  I also masked where I wanted the sentiment, though I don't think I'd do that again, as having the background stop solidly around the words looks kind of odd.

Again, I used a clear glitter pen to make the wings shine.


Supplies:
Cardstock: Recollections
Stamp: Make It Crafty - Fairy Celandine; Inkadinkado - Leaves; Whiff of Joy - Magical Wishes Sentiments
Ink: Memento
Markers: Crayola
Clear Copic Atyou Spica Glitter Pen

September 4, 2012

Fairy Card 1

This card was an experiment in a couple of things.  I improved all of them in the second card I did, which I'll post tomorrow.


I started the card by 'ink painting' the background.  That meant taking my sponges and making a radiating pattern from the center where I intended to stamp the fairy.  I used blue and green ink, then some gold to give it a bit of sparkle.  The obvious error here is that I inked into the fairy's skin (most notably her face).  I coloured her with markers, used a glitter pen to give her wings some shine, and added a few heat set gems.  To finish, I punched the bottom.


While I wasn't entirely happy with the ink background (it smeared well in some areas and made splotches in others) on the whole I did like the card.

Supplies:
Cardstock: Recollections
Stamp: Make it Crafty - Fairy Celandine
Ink: Memento, Encore Ultimate Metallic
Markers: Crayola
Punch: EK Tools - Dotted Scallop Edger 
glitter pen
hot fix gems (I own these from several companies, so I'm not saying which I used, as I'm not sure)