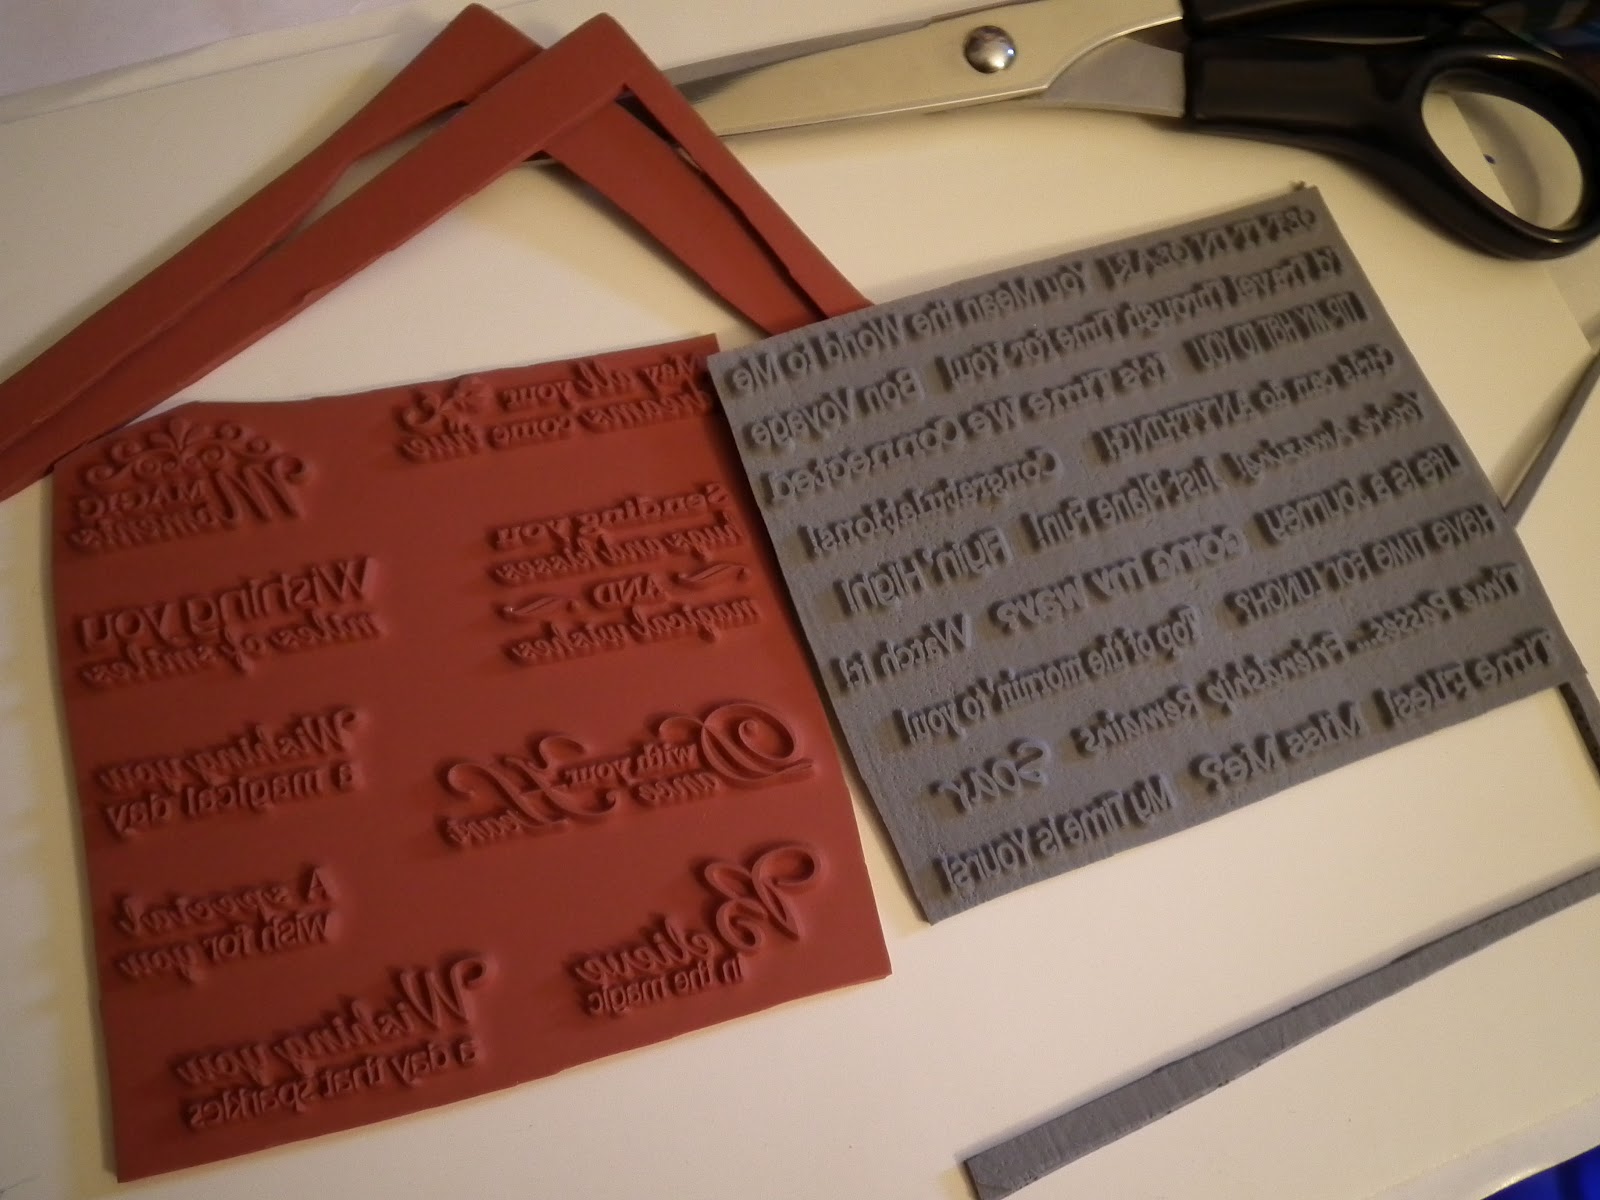
So, my cling foam arrived and I was able to mount my sentiment stamps. Following the directions of a video I found on youtube a few weeks back, I got to work.
Step 1, trim the outside edges a bit.
Step 2, cut the cling foam to size and peel off the paper on the sticky side. This stuff is VERY sticky, and will muck up your scissors when you cut it (ie, you'll get sticky residue on your scissors). Use an eraser to get the residue off when you're done.
Step 3, with the rubber on the foam, cut the different sentiments apart. This is fairly hard to cut, as the foam is quite thick and the rubber tough.
This is a bonus step. After peeling the front paper off (the side that clings to acrylic blocks), I used a Copic (ie permanent) marker to write the sentiments on the front. I figured it would be easier to find the sentiment I'm looking for if I can read them faster (and while I can read backward script, why put myself to the trouble?).
Voila, self-mounted sentiment stamps. I definitely prefer buying my stamps prepped for stamping but doing it myself was an interesting experience.
Showing posts with label cling stamps. Show all posts
September 12, 2012
August 2, 2012
Stamping Basics: Types of Stamps
There are 4* major types of stamps you can buy. And here they are:
1. Wood mounted. These are the most expensive, mainly because they're the longest lasting. Red rubber allows for deep impressions with lots of detail, and the wood backing means stability. They're hard to store unless you have a lot of room though, which is why there are other options out there.
2. Cling mounted. Cling is a foam padding added to the back of rubber stamps that sticks to an acrylic block. Note, it's not sticky on its own (though I've seen warnings that it will adhere permanently to blocks if stored on them), it just 'clings' to the block. Sometimes the stamp face is printed on the back, sometimes it isn't. (Note, I drew the line on the back of my unprinted stamps to help with alignment.)
3. Unmounted rubber. Yesterday I got my first order of unmounted stamps. They come... unmounted. It's just a thin sheet of uncut rubber with your stamps. These must be mounted either on cling or wood in order to be used. Sentiment stamps and sheets of images have to be cut out.
4. Clear stamps. These are popular due to their ease in placement (it's easier to get proper alignments when you can see what and where you're stamping). You have to clean them properly and store them out of sunlight or they'll deteriorate quickly. These have sticky backs that again cling to acrylic blocks for stamping. You also have to condition these to remove oils (I've noticed the newer stamps I get don't have the problems I had with older sets with regards to stamping clearly without splotching). This is easily done by lightly rubbing an eraser over the stamp (a trick I only recently learned. I was beginning to despair that my stamping was just horrible when I stumbles across this trick. I'll do a longer post about it later).
Acrylic blocks come in different widths, shapes and sizes, both with and without grid markings. I find the grid helps when placing stamps, and it's best to have an acrylic roughly the same size as your stamp (if the acrylic is too big, you may press down the sides and get ink stains on your paper).
For a more detailed view of the pros and cons of rubber vs clear stamps, as well as pictoral evidence of why storing clear stamps properly is important, check out Mementos In Time's post about this.
* I say 4 because that's what I know (and own) right now. But as I'm constantly learning new things...
1. Wood mounted. These are the most expensive, mainly because they're the longest lasting. Red rubber allows for deep impressions with lots of detail, and the wood backing means stability. They're hard to store unless you have a lot of room though, which is why there are other options out there.
2. Cling mounted. Cling is a foam padding added to the back of rubber stamps that sticks to an acrylic block. Note, it's not sticky on its own (though I've seen warnings that it will adhere permanently to blocks if stored on them), it just 'clings' to the block. Sometimes the stamp face is printed on the back, sometimes it isn't. (Note, I drew the line on the back of my unprinted stamps to help with alignment.)
3. Unmounted rubber. Yesterday I got my first order of unmounted stamps. They come... unmounted. It's just a thin sheet of uncut rubber with your stamps. These must be mounted either on cling or wood in order to be used. Sentiment stamps and sheets of images have to be cut out.
4. Clear stamps. These are popular due to their ease in placement (it's easier to get proper alignments when you can see what and where you're stamping). You have to clean them properly and store them out of sunlight or they'll deteriorate quickly. These have sticky backs that again cling to acrylic blocks for stamping. You also have to condition these to remove oils (I've noticed the newer stamps I get don't have the problems I had with older sets with regards to stamping clearly without splotching). This is easily done by lightly rubbing an eraser over the stamp (a trick I only recently learned. I was beginning to despair that my stamping was just horrible when I stumbles across this trick. I'll do a longer post about it later).
Acrylic blocks come in different widths, shapes and sizes, both with and without grid markings. I find the grid helps when placing stamps, and it's best to have an acrylic roughly the same size as your stamp (if the acrylic is too big, you may press down the sides and get ink stains on your paper).
For a more detailed view of the pros and cons of rubber vs clear stamps, as well as pictoral evidence of why storing clear stamps properly is important, check out Mementos In Time's post about this.
* I say 4 because that's what I know (and own) right now. But as I'm constantly learning new things...
Subscribe to:
Posts (Atom)