Showing posts with label Valentine's Day Card. Show all posts

March 14, 2017

Transformation Card

For their 10th Anniversary Papertrey Ink's set up a series of challenges, one of which is to transform a card you weren't happy with into one you are.

This is the original card using the Simply Jane stamp:

While I liked the Valentine's Day colours, I didn't like what elements I made each colour and the layout was not the best.

Here's my transformed card:


I made it an easel card. I die cut two frames in addition to the stamped frame. I also added some stamped flowers from the set (the bouquet) in light pink to the base cardstock. The easel is held open with a heart button.

February 14, 2014

Sealed With a Kiss Card

I made this card a few weeks back using a kiss stamp I got for Christmas.  I took some pink and white cardstock, cut squares and then stamped and clear heat embossed the stamp in a dark pink.  I did the same (minus the embossing) for the 'love' sentiment and affixed the panels to the red cardstock base using a mix of glue and pop dots.


February 6, 2014

Sexy Cupid Valentine

I made this card for 2 challenges.  I haven't done a Kenny K challenge for a while, so I coloured the sexy cupid image while watching TV earlier this week and whipped up the rest of the card today.  It's going into their Love challenge.  I added a few hearts so I could also enter it in Simon Says Stamp's Heart challenge.

 The cupid was coloured with pencil crayons, including highlights done with metallic pencil crayons (which are fantastic).  I added some glitter gel pen to the wings for a tiny bit of sparkle (it doesn't work over pencil crayons, so the wings are mostly pencil crayon free, just a little silver for shading).

I die cut a Spellbinder's heart to go behind her, and die cut an edging on my black patterned/embossed paper.  I wanted her to aim at something and so made a heart shaped rosette (with a die I got for Christmas).

I may go back and write 'Be Mine' or something equally cheesy on the heart.  Or not.

January 16, 2014

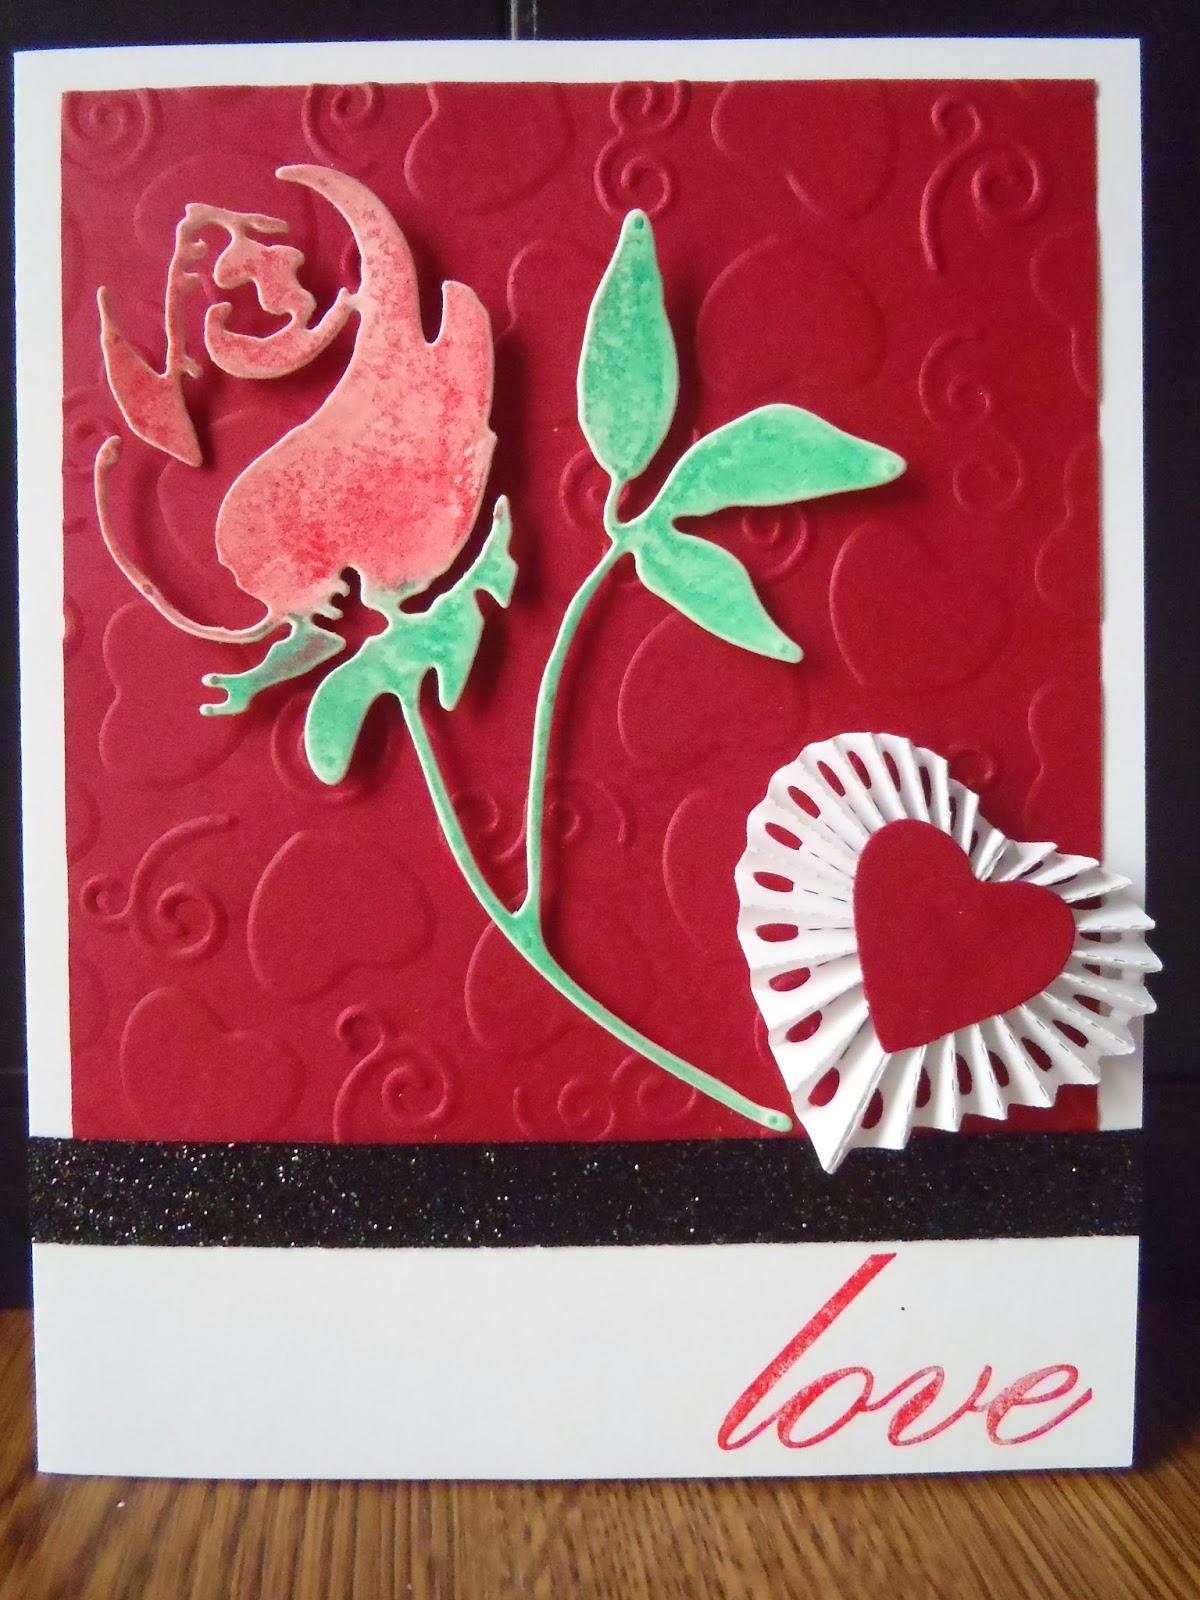
Love Rose Card

I made this card for Simon Says Stamp's Emboss It challenge and I'm also submitting it to Penny Black's Sending Hugs challenge (even though I used a PB die rather than stamp).

I started out by making the accordion heart, die cutting the form twice and glueing it down.  I cut and embossed the red panel and then die cut the rose out of watercolour paper.  Because the Penny Black rose die is so delicate, I coloured it with gelatos before taking it out the negative paper.  I wet a cloth and melded the colours so it would have a slight watercoloured look.

I stamped 'love' on the cardstock and assembled the card, using a piece of glitter ribbon as a border.  I'm really happy with how this turned out.


February 14, 2013

Valentine's Day Card

Happy Valentine's Day, everyone.  :)

Here's the card I made for my husband.

 It's got more frills than I'd normally use on a card for him, but I was into the incire die, and it's geometric, so I think he'll like it.

The backing was embossed and the images stamped in various inks.  I coloured in the liquids and then used Mod Podge on them to give them some dimension.  Come to think of it, he'll complain that it's the glass that needs to be raised, not the liquids, so I think I'll go add some more Mod Podge to this so it's dry by tonight.
Supplies:
Cardstock: Recollections
Embossing Folder: Spellbinders M-Bossabilities Hearts (the folder was too thick for the regular sandwich in my Bigshot, so I had to improvise with bits of hard cardboard as the top plate)
Die: Nellie's Multi-Frames - Incire Flower 2
Stamp: There She Goes - Chemistry
Markers: Stampin Up, Crayola
Ink: Memento
Mod Podge Dimensional Magic

February 13, 2013

Email Valentine's Day Card

I had the chance to play around with some new products and create a card that I can submit to a challenge.  It's for a Paper Smooches challenge to put a heart on a card.  So I pulled out my brand spankin new Teen Routine stamp set and got to work.

The first step was making the background.  I drew a grid pattern on my paper and stamped the controller in tan ink on my cream paper.  Then I had to think of a main image.  I wanted something computer oriented, and settled on the iPad images.

This is when things got really fun.  My first idea was to cut out plastic for the screens, so I stamped the iPads on some of the discarded plastic packaging from my Papertrey Ink stamps in Stazon ink (other inks will wipe off the plastic).  Then I thought about the backing and realized I probably didn't need to stamp the images on plastic.  Ah well.

For the iPad propers, I stamped the images on black paper and used my new Ranger holographic embossing powder.  I got the powder thinking it would be a good substitute for clear, little thinking it would look as amazing as it does - all glittery (I'll probably need clear anyway, as this won't do for the technique I wanted the clear powder for, BUT it looks amazing!  So I'm glad I bought it).  I heated the powder (and possibly burnt it, I'm not sure if it's supposed to have brown in it, but it works for this project so I'm cool with the effect here).

I cut out the screens and tried a few samples to see how to best attach them.  I ended up using white glue over my vellum adhesive because it dried cleaner - on the sample.  I'm not too happy with the smears I got on the final card, but there's not much I can do about that now.

I added some punched hearts and a tiny letter printed on plastic (the 'email').


I don't normally do much on the insides of my cards, beyond write a message, but I wanted something else here and so did this (mainly because I'd die cut the large hearts for the front and wanted to use them somewhere): 

Supplies:
Cardstock: Recollections cream, black, metallic brown, metallic gold; plastic/acetate
Stamps: Paper Smooches - Teen Routine
Punch: punch bunch mini heart
Ink: Stazon black, memento tan
Ranger holographic embossing powder
Sizzix accordion fold flower 2 die
Gelly Roll Metallic black pen