I've been having some fun with heat embossing techniques lately. Here's a birthday card I made. It was quite simple and fun to do.
I stamped the Penny Black flower and Hot off the Press sentiment with Versamark ink, then heat embossed them in black on watercolour paper. I then scribbled over the page with 3 metallic gelatos: blue, purple and silver. I spritzed the page and then rubbed a sponge over the gelatos to cover the page fully and blend the colours. Once it was dry I glue taped the image to a light purple card.
April 12, 2013
April 10, 2013
Hot Air Balloon Birthday Wishes
I made this card for Papertrey Ink's Make It Monday Challenge, Watercoloring Embossed Images. This is a fun technique.
All of the stamps are from Papertrey Ink's Up, Up, and Away set. I started by stamping the hot air balloons on watercolour paper. I put a few drops of different coloured reinkers on a piece of plastic and got out a container of water and a brush. Then, taking small amounts of ink and water, I carefully painted the balloons. For the baskets, as I don't have a yeller reinker, I tried something different. I coloured on the plastic with a water based Crayola marker to get some ink, and used that. When they were dry I cut them out.
For the background (also on watercolour paper) I painted the hills with a peacock shade of green, using more water to wash out the colour for the hills further back (and yes, I realized after gluing my balloons on that I'd messed up the perspective). For the clouds I again coloured with markers on the plastic, this time in two shades of grey. I added some water (probably too much) and painted the colour directly on the cloud stamps. I actually like the marbled effect I got. It worked well for clouds, though I won't try that for solid images.
I glued the two smaller balloons on the page and used pop-dots for the largest one. I also punched one cloud and popped that on for dimension. Finally I stamped my sentiment and added it to the back (and then realized I should have done that before adding the popped elements).
All of the stamps are from Papertrey Ink's Up, Up, and Away set. I started by stamping the hot air balloons on watercolour paper. I put a few drops of different coloured reinkers on a piece of plastic and got out a container of water and a brush. Then, taking small amounts of ink and water, I carefully painted the balloons. For the baskets, as I don't have a yeller reinker, I tried something different. I coloured on the plastic with a water based Crayola marker to get some ink, and used that. When they were dry I cut them out.
For the background (also on watercolour paper) I painted the hills with a peacock shade of green, using more water to wash out the colour for the hills further back (and yes, I realized after gluing my balloons on that I'd messed up the perspective). For the clouds I again coloured with markers on the plastic, this time in two shades of grey. I added some water (probably too much) and painted the colour directly on the cloud stamps. I actually like the marbled effect I got. It worked well for clouds, though I won't try that for solid images.
I glued the two smaller balloons on the page and used pop-dots for the largest one. I also punched one cloud and popped that on for dimension. Finally I stamped my sentiment and added it to the back (and then realized I should have done that before adding the popped elements).
April 7, 2013
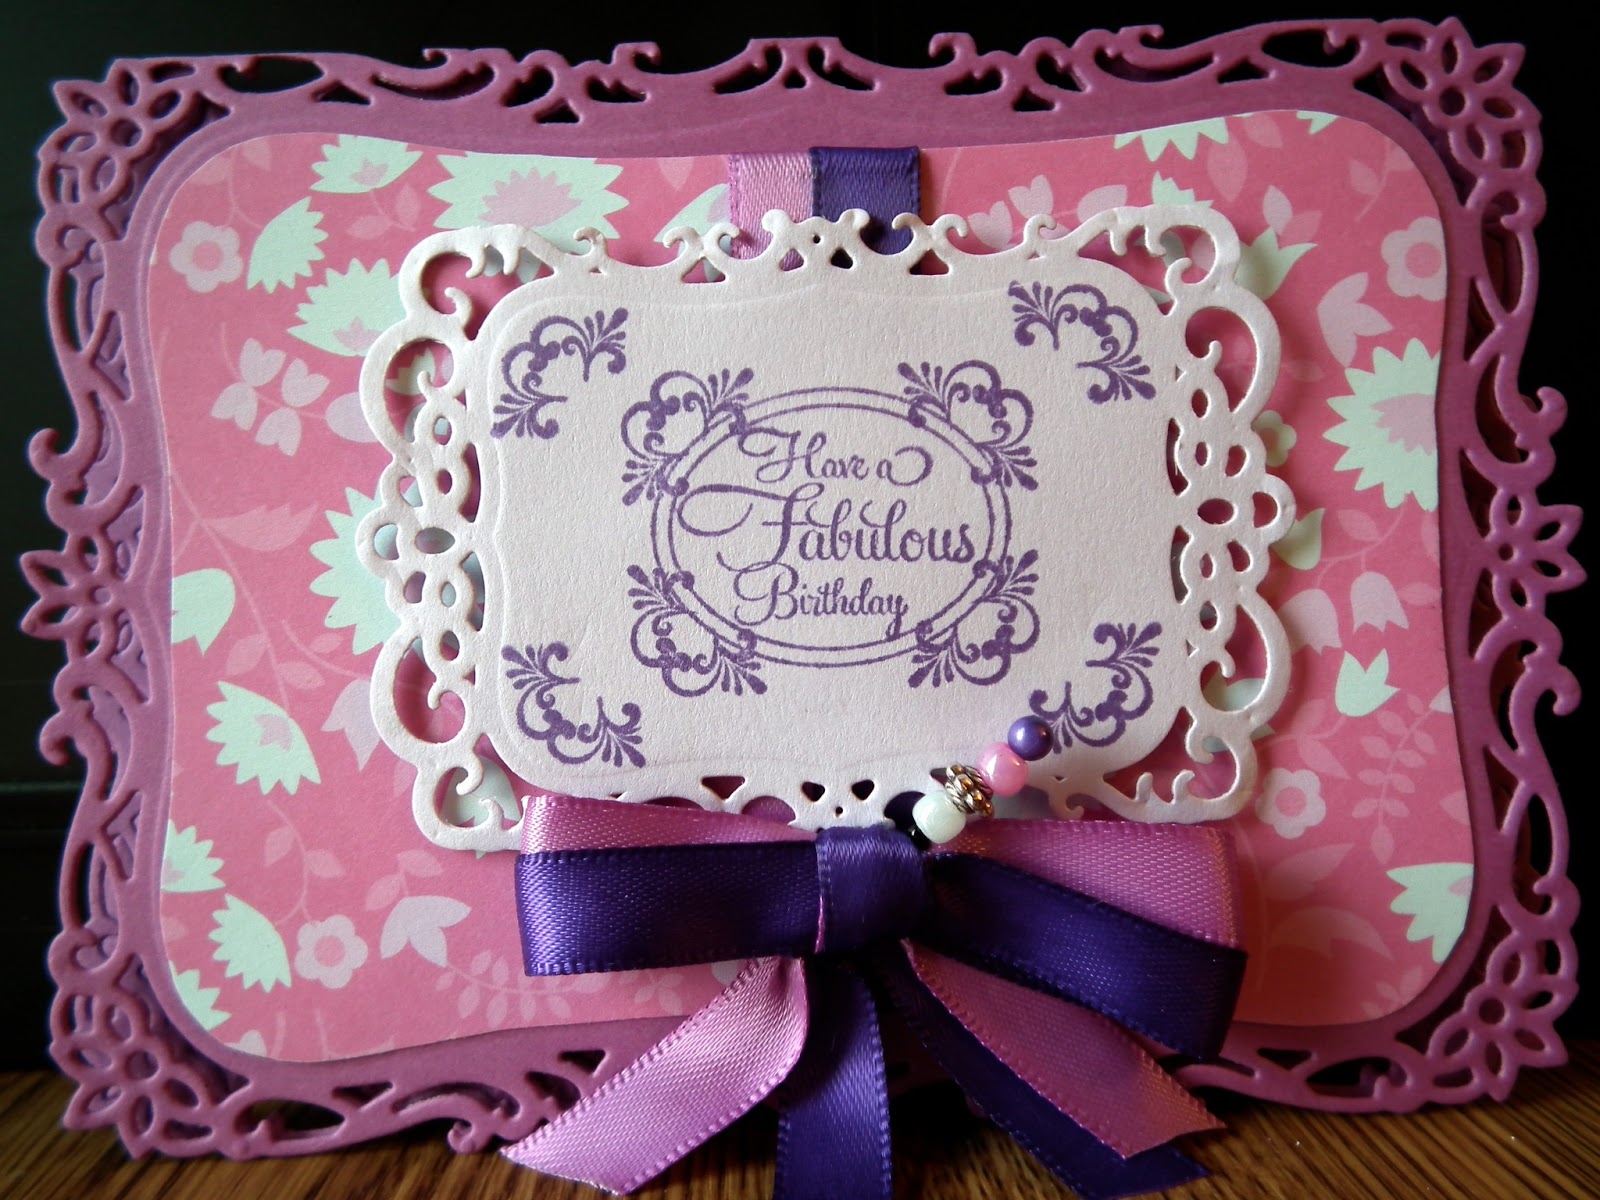
Fancy Birthday Card
Today's card is fancier than I normally make, but I LOVE these cards (even if I sometimes think they're too busy, hence why I don't make them often. They're also time consuming but definitely worth the effort).
This card was specifically designed for JustRite's Friday Challenge #94, which is a sketch challenge. I decided to make the card birthday themed so I could also submit it to Simon Says Stamp's Happy Birthday challenge.
I started out by die cutting my base using a Spellbinder's die. I used the same die to trace the center area (which doesn't die cut) on my patterned paper and then hand cut it out so it would follow the lines of the die cut. The center panel is also a Spellbinder's die, and the stamps JustRite (You Inspire Me), stamped with grape Memento ink.
I cut 2 shades of ribbon and tied them around the center panel before glueing the panel onto the card base. The center panel was attached to the card with pop dots and the bow tied separately and glued on. Finally I stuck a pin with various beads on it through the center of the bow.
This card was specifically designed for JustRite's Friday Challenge #94, which is a sketch challenge. I decided to make the card birthday themed so I could also submit it to Simon Says Stamp's Happy Birthday challenge.
I started out by die cutting my base using a Spellbinder's die. I used the same die to trace the center area (which doesn't die cut) on my patterned paper and then hand cut it out so it would follow the lines of the die cut. The center panel is also a Spellbinder's die, and the stamps JustRite (You Inspire Me), stamped with grape Memento ink.
I cut 2 shades of ribbon and tied them around the center panel before glueing the panel onto the card base. The center panel was attached to the card with pop dots and the bow tied separately and glued on. Finally I stuck a pin with various beads on it through the center of the bow.
April 4, 2013
Dragon Birthday
I made this card for Simon Says Stamp's Challenge Blog. It's their 4th anniversary, and so the theme this week is Happy Birthday.
I started this card with the idea of using my Graphic 45 Bird Song cling #3 stamps. I'm ashamed to say that though I've had the set for several months this is the first time I've used them. I love the designs but haven't done much with an Asian theme lately.
I thought either the phoenix or dragon stamp would look fantastic embossed with my holographic embossing powder. Turns out the stamp is too detailed so it's a bit hard to see what the picture is. Next time I'll ink the image first in silver or gold and then emboss it. Still, it's got a fabulous glitter effect in a fascinating mix of green and brown on its black background.
I wanted the sentiment to match and so daubed my bronze and teal metallic pigment inks on a sheet of plastic and then picked up the ink with the stamp (I didn't want to contaminate my stamp pads by using one colour and then the second. This way I also got some fancy mixing of the colours).
The backing is red cardstock embossed with a Cuttlebug folder from an oriental set I have.
I started this card with the idea of using my Graphic 45 Bird Song cling #3 stamps. I'm ashamed to say that though I've had the set for several months this is the first time I've used them. I love the designs but haven't done much with an Asian theme lately.
I thought either the phoenix or dragon stamp would look fantastic embossed with my holographic embossing powder. Turns out the stamp is too detailed so it's a bit hard to see what the picture is. Next time I'll ink the image first in silver or gold and then emboss it. Still, it's got a fabulous glitter effect in a fascinating mix of green and brown on its black background.
I wanted the sentiment to match and so daubed my bronze and teal metallic pigment inks on a sheet of plastic and then picked up the ink with the stamp (I didn't want to contaminate my stamp pads by using one colour and then the second. This way I also got some fancy mixing of the colours).
The backing is red cardstock embossed with a Cuttlebug folder from an oriental set I have.
April 3, 2013
Some Odd Girl - Make a Splash Mermaid
I recently won a stamp set from Some Odd Girl Stamps called Clever Kitties. I decided to take the opportunity to buy some of their other sets, as I love their designs - particularly the critters. Yesterday they arrived, but I didn't have time for stamping so I finally got to play with them today.
I've wanted a mermaid stamp for ages, so instead of playing with the kitties (sorry kitties, I'll get to you soon) I went for the Under the Sea Mae set (they've got several characters they use, and Mae is one of them that's been turned into a mermaid for this set).
I started out with white cardstock. Instead of inking in black the way I usually do, I decided to ink it in teal. That set the tone for the rest of the colouring, which was done with pencil crayons and blended with gamsol.
I cut the image out with an oval Spellbinders die. The oval came out when I switched plates for the embossing, which is why it's a bit lopsided (you can't really see it in the picture). I don't mind though, I think it adds something to this image. I used a red gel pen for the 'stars' and a clear one to go over the fins so they shimmer a bit.
I decided on a dark teal cardstock and cut and inked the sentiment label (also Spellbinders). For the fish, I used the image from the Clever Kitty's set (so I did play with them a little bit), inking them with markers. The red one's a reverse image, stamped first on plastic and then on paper. As it came out very faint I just coloured over the lines with the marker again. They're filled in with pencil crayon.
Something was missing... I looked around my craft table and spotted some lighter teal crepe paper that wrapped stamps from an order a while back. Perfect. I punched out some flowers, stuck a rhinestone inside and wrapped the petals around them so they'd look a bit more dimensional before smoothing them back. The mermaid and label are tape gunned on, the flowers glued and the fish on with pop dots.
I have to admit, I really like how this card turned out.
I've wanted a mermaid stamp for ages, so instead of playing with the kitties (sorry kitties, I'll get to you soon) I went for the Under the Sea Mae set (they've got several characters they use, and Mae is one of them that's been turned into a mermaid for this set).
I started out with white cardstock. Instead of inking in black the way I usually do, I decided to ink it in teal. That set the tone for the rest of the colouring, which was done with pencil crayons and blended with gamsol.
I cut the image out with an oval Spellbinders die. The oval came out when I switched plates for the embossing, which is why it's a bit lopsided (you can't really see it in the picture). I don't mind though, I think it adds something to this image. I used a red gel pen for the 'stars' and a clear one to go over the fins so they shimmer a bit.
I decided on a dark teal cardstock and cut and inked the sentiment label (also Spellbinders). For the fish, I used the image from the Clever Kitty's set (so I did play with them a little bit), inking them with markers. The red one's a reverse image, stamped first on plastic and then on paper. As it came out very faint I just coloured over the lines with the marker again. They're filled in with pencil crayon.
Something was missing... I looked around my craft table and spotted some lighter teal crepe paper that wrapped stamps from an order a while back. Perfect. I punched out some flowers, stuck a rhinestone inside and wrapped the petals around them so they'd look a bit more dimensional before smoothing them back. The mermaid and label are tape gunned on, the flowers glued and the fish on with pop dots.
I have to admit, I really like how this card turned out.
March 29, 2013
Happy Easter!
I made this card a few months back, but I love how it turned out. I started with a piece of green cardstock and found a panel from a Die Cuts for a View paper pad that had a similar colour in it (the leaves). I added a sparkly black ribbon to cover the join and a few punched butterflies at the bottom. The trail and sentiment were done with a black metallic gel marker.
Hope you all have a Happy Easter!
March 28, 2013
Quick, Sticker Easter Card
This was a card I made quickly last year. I used a card base I got from a magazine kit, added some Dollar Store stickers (bunny and butterfly), cut a few ovals and decorated them with glitter glue and made a fringe of grass (which, in retrospect I should have cut somewhat to give dimension).
It was quick, easy and looks pretty good.
Subscribe to:
Posts (Atom)