September 20, 2013

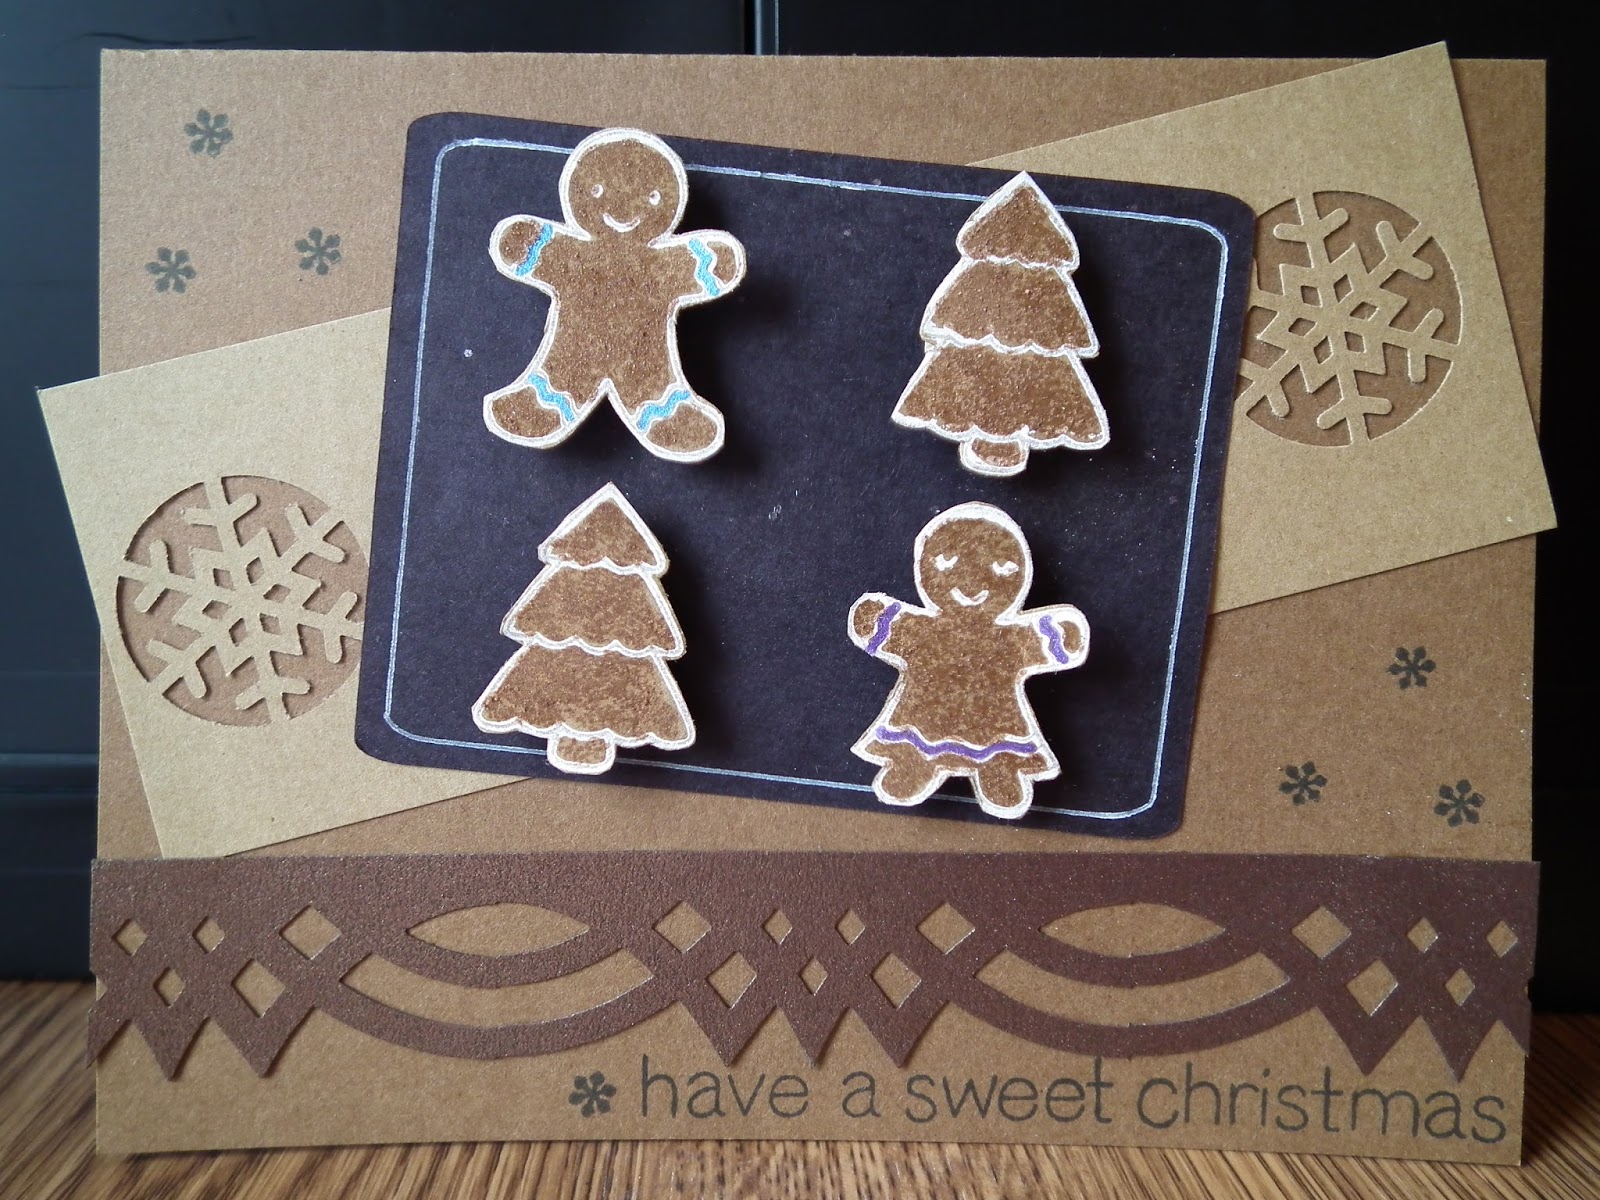
Monochromatic Christmas Card

I made this card for the Lawnscaping challenge going on right now, monochromatic.

I wanted to use more of my scratch and sniff embossed gingerbread cookies, so I decided to make my card with shades of brown.

I punched snowflakes out of a lighter piece of brown cardstock and a border out of a metallic brown/bronze cardstock, then started assembling things.

The cookies were fussy cut a while back and applied with pop dots.  The tray was cut on a silhouette and lined with a white gel pen.  I used a bit of coloured gel pen on the cookies themselves.

I used the sentiment from the Sweet Christmas set, as well as the mini snowflake, which I stamped in the open areas.  I probably should have centered the sentiment, but I didn't think of that in time.


Crafting companies are so amazing.  Lawn Fawn recently had a contest for their newest collection, stamps and dies.  And, along with several other lucky people, I won!  This is the prize they sent me, the complete Into the Woods collection.  And it looks awesome. :D


September 19, 2013

Hydrangea Birthday

Today's card is for the current Simon Says Stamp Challenge, to celebrate Stamptember and use a product from the SSS catalogue.  I used SSS's Delicate Dahlia die and Impression Obsession's Hydrangea die, which I got at their store.

I started by die cutting the hydrangea out of light green and light blue cardstock.  I then used the dahlia die to emboss the upper and bottom corner of my cardstock base.  I glued on the hydrangea stem and the thin bits of the leaves, using pop dots to raise the leaves themselves up.  I glued down the flower backing so there's a nice matching blue behind the flowers.  I removed the fuzz from a Q-tip and used the end to fold the individual flowers around and so I could dab bits of glue on the bases.  I then applied them to the flower base (I die cut 4 batches of flowers, though a 5th wouldn't have been amiss).

I applied a bit of chalk ink to the base of the card to give some colour to the embossed image there and the impression of grass.  I guess pigment ink it's a bit more forgiving than the dye inks I normally sponge with, so I didn't get any smear marks the way I usually do.  I'll have to remember that.  

To finish off the card, I stamped Happy Birthday in a light blue pigment ink.


September 13, 2013

Embossed Wedding Card

This is a wedding card I made when I first got my Big Shot intending it as a quick wedding card.  So far, I've ended up personalizing my cards when friends have gotten married, so it's still in my pile.

I started out by punching the edge of my black cardstock and putting it on the white card base.  Then I cut the three banners out of silver cardstock, embossed them and glued them to the card.  For the center image the deboss went on the shiny side, which I thought made a nice contrast with the other two embossed images, so I wasn't too miffed with the error.  


September 12, 2013

Beary Birthday Card

Today I've got another card I made quite some time ago but never posted.  Enjoy!


September 11, 2013

Scent Embossed Gingerbread Cookie Cards

I started this last week after seeing this tutorial on Papertrey Ink's Capture the Moment blog for making your own scented embossing powder.  I remembered this cute recipe book cover on the Lawn Fawn blog from last Christmas with a design I wanted to reproduce.  I actually bought the stamp set they were profiling because I liked that cover so much.

So, first I needed my spices.  I mixed the spices used for gingerbread cookies, which turned out to be too strong for what I wanted and didn't quite smell like gingerbread.  The tutorial for this technique emphasized not adding sugar (because it will burn when you heat the powder), and I imagine that and molasses help give the traditional scent.  I messed with the powder, adding some more ginger, etc, until I liked what I ended up with well enough.  I then use 1 tsp of my spice mix and combined it with 1* tsp clear embossing powder in a small container I got at the dollar store.
[* After looking at the tutorial post again, it's supposed to be 2 tsp embossing powder to 1 tsp spice/scent, which is probably why I had issues if I used too much powder at once.  Having said that, the 1-1 ratio did work, just probably not as well as the 1-2 I was supposed to use.]

Now, my gingerbread cookie stamps aren't solid, so this was the perfect excuse for me to pull out the Versamark pen I bought years ago and never used.

I started the cookies by stamping a bunch in white pigment ink and another set in black dye ink.  I wasn't sure which I'd prefer, so decided to do both.  After the pigment ink had dried, I went over the faces of the figures with the Versamark pen, and then added the embossing powder on top.  I did 3-4 at a time (and found that 4 was pushing it, as the 4th ones turned out spotty) and tapped off the excess powder.   Then I heated the 3-4 designs before shaking my powder to keep it properly mixed and moving on to the next group.

Here, you can see a few embossed.  The cardstock looks darker (due to the spices in the embossing powder).  Here's a close-up.  You can see how the embossing makes the cookies look a bit rough.  And if you scratch them a bit, they smell!

Fussy cutting them all out took a decent amount of time, but they look great.  I added a few gel pen accents to the arms/legs/hem and tree.

The final step, which I did today, was to cut out the cookie trays with my Silhouette SD and assemble the cards.  I also cut out a slightly smaller tray out of acetate, which I used to help me white gel pen a line around the pan.

I did two cards, trying out slightly different designs.  For the first card I added a strip of glitter ribbon above the stamped sentiment.  I attached the cookies using pop-dots.

For the second card, I added a contrasting panel, which allowed me to wrap some twine around the card.  I'm submitting this card to this week's Simon Says Stamp's embossing challenge.

September 6, 2013

Becomes a Butterfly

This was a pretty quick card I made using one of the paint chips you get at hardware stores.  I started by punching a butterfly from each section, giving a gradient effect.  Then I took a lighter piece of purple cardstock, stamped the Unity Stamps sentiment (which I can now get straight using my stamp positioner.  It's unmounted rubber and it was a pain to get it correctly placed before) in purple ink.  I glued on the butterflies and added a few pearls to the sentiment for effect.


September 5, 2013

Colourful Vines

I started this card a while back but only finished it today.  I started out by stamping the image in white pigment ink on black paper.  Then, when it was dry, I coloured over the image with pencil crayons.  I added some dots with a white gel pen and mounted it on a piece of light blue cardstock.